Default iRedMail installation is not production-ready. Learn how to harden your mail server with SSL certificates, SASL authentication, firewall rules, fail2ban, root security, rate limiting, and monitoring.
Congratulations! You've installed iRedMail. The web interface works. Email flows. But is it secure?
Default iRedMail installations are functional, not hardened. They use self-signed certificates. Root SSH login may be enabled. Fail2ban is installed but not verified. Firewall rules might be incomplete. And there's no real-time monitoring.
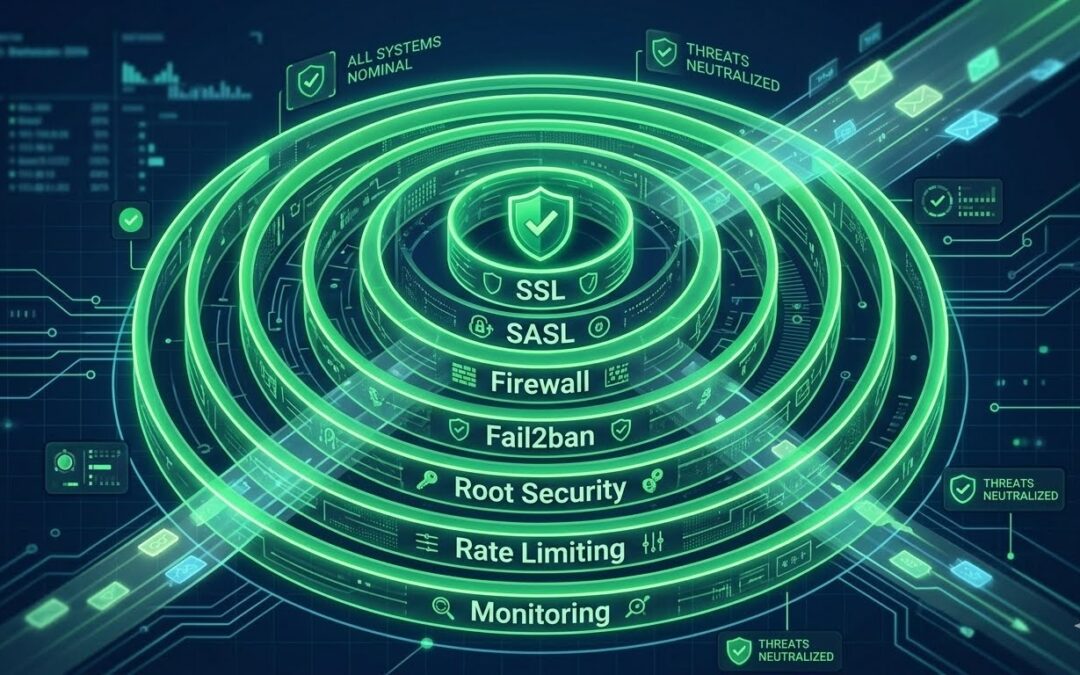
This guide transforms your default iRedMail setup into a production-ready, hardened email server. We'll implement 7 essential security layers:
- SSL/TLS with Let's Encrypt
- SASL Authentication
- Firewall Hardening
- Fail2ban with Alerts
- Root Security
- Rate Limiting
- Monitoring & Alerting
By the end, your server will be protected against common attacks, you'll receive instant alerts, and your users will enjoy a secure email experience.
Layer 1: SSL/TLS with Let's Encrypt
Replace self-signed certificates with trusted CA certificates.
Implementation
# Install certbot
sudo dnf install certbot python3-certbot -y

# Stop Nginx temporarily
sudo systemctl stop nginx

# Obtain certificate
sudo certbot certonly --standalone -d mail.yourdomain.com --email admin@yourdomain.com --agree-tos --no-eff-email

# Start Nginx
sudo systemctl start nginx

# Configure Postfix
sudo postconf -e "smtpd_tls_cert_file = /etc/letsencrypt/live/mail.yourdomain.com/fullchain.pem"
sudo postconf -e "smtpd_tls_key_file = /etc/letsencrypt/live/mail.yourdomain.com/privkey.pem"

# Configure Dovecot
sudo sed -i "s|ssl_cert = .*|ssl_cert = </etc/letsencrypt/live/mail.yourdomain.com/fullchain.pem|" /etc/dovecot/conf.d/10-ssl.conf
sudo sed -i "s|ssl_key = .*|ssl_key = </etc/letsencrypt/live/mail.yourdomain.com/privkey.pem|" /etc/dovecot/conf.d/10-ssl.conf

# Restart services
sudo systemctl restart postfix dovecot nginx

# Set up auto-renewal
echo "0 2 * * * certbot renew --quiet --post-hook 'systemctl restart postfix dovecot nginx'" | sudo tee -a /etc/crontab
Verification
openssl s_client -connect mail.yourdomain.com:465 -servername mail.yourdomain.com 2>/dev/null | grep "verify return code"
# Expected: verify return code: 0 (ok)
Layer 2: SASL Authentication
Ensure SMTP authentication works from any IP (no whitelisting needed).
Implementation
# Enable SASL
sudo postconf -e "smtpd_sasl_auth_enable = yes"
sudo postconf -e "smtpd_sasl_type = dovecot"
sudo postconf -e "smtpd_sasl_path = private/dovecot-auth"

# Configure Dovecot auth socket
sudo nano /etc/dovecot/conf.d/10-master.conf
Add/modify the service auth section:
service auth {
  unix_listener /var/spool/postfix/private/dovecot-auth {
    mode = 0666
    user = postfix
    group = postfix
  }
}
# Fix permissions
sudo mkdir -p /var/spool/postfix/private
sudo chown postfix:postfix /var/spool/postfix/private
sudo chmod 755 /var/spool/postfix/private
# Restart services
sudo systemctl restart dovecot postfixVerification
sudo doveadm auth test youruser@yourdomain.com
# Expected: auth succeeded
Layer 3: Firewall Hardening
Replace raw port rules with proper service definitions.
Implementation
# Remove raw ports (if present)
sudo firewall-cmd --permanent --remove-port=465/tcp
sudo firewall-cmd --permanent --remove-port=587/tcp

# Add proper services
sudo firewall-cmd --permanent --add-service={http,https,smtp,smtp-submission,smtps,imaps,pop3s}

# Create rich rules for known attackers (optional)
sudo firewall-cmd --permanent --add-rich-rule='rule family="ipv4" source address="KNOWN_BAD_IP" drop'

# Reload
sudo firewall-cmd --reload
Verification
sudo firewall-cmd --list-services
# Should include: smtp smtp-submission smtps imaps pop3s
Layer 4: Fail2ban with Alerts
Configure fail2ban and set up instant notifications.
Implementation
# Verify all jails are working
sudo fail2ban-client status

# Enable email alerts
sudo nano /etc/fail2ban/jail.local
Add:
[DEFAULT]
destemail = admin@yourdomain.com
sendername = fail2ban
action = %(action_mwl)s
[sshd]
enabled = true action = %(action_mwl)s
[postfix]
enabled = true action = %(action_mwl)s
# Install sendmail if needed
sudo dnf install sendmail -y
sudo systemctl enable --now sendmail

# Restart fail2ban
sudo systemctl restart fail2ban
Optional: Telegram Alerts
# Create telegram action
sudo nano /etc/fail2ban/action.d/telegram.conf
[Definition]
actionban = curl -s -X POST "https://api.telegram.org/bot<YOUR_TOKEN>/sendMessage" -d "chat_id=<YOUR_CHAT_ID>" -d "text=🚨 Fail2ban: <name> banned <ip>"
actionunban = curl -s -X POST "https://api.telegram.org/bot<YOUR_TOKEN>/sendMessage" -d "chat_id=<YOUR_CHAT_ID>" -d "text=✅ Fail2ban: <name> unbanned <ip>"Layer 5: Root Security
Disable direct root SSH access.
Implementation
# Disable root SSH login
sudo sed -i 's/^#PermitRootLogin yes/PermitRootLogin no/' /etc/ssh/sshd_config
sudo sed -i 's/^PermitRootLogin yes/PermitRootLogin no/' /etc/ssh/sshd_config

# Restart SSH
sudo systemctl restart sshd

# Create a sudo user if you don't have one
sudo useradd -m -G wheel adminuser
sudo passwd adminuser
Verification
# Try to login as root (should fail)
ssh root@yourdomain.com
# Expected: Permission denied
Layer 6: Rate Limiting
Prevent abuse through excessive connections.
Implementation
# Postfix rate limiting for outgoing email
sudo postconf -e "smtp_destination_rate_delay = 5s"
sudo postconf -e "smtp_destination_concurrency_limit = 2"

# Connection limits per client
sudo postconf -e "smtpd_client_connection_rate_limit = 10"
sudo postconf -e "smtpd_client_connection_limit = 10"

# Restart Postfix
sudo systemctl restart postfix
Fail2ban burst protection (already in iRedMail)
The postfix-burst jail limits rapid email sending. Adjust if needed:
sudo nano /etc/fail2ban/jail.d/postfix-burst.local[postfix-burst]
enabled = true
maxretry = 10 # 10 rapid emails
findtime = 60 # within 60 seconds
bantime = 600 # ban for 10 minutesLayer 7: Monitoring & Alerting
Set up comprehensive monitoring.
Daily Security Report Script
sudo nano /usr/local/bin/security-report.sh#!/bin/bash
# Daily security report
REPORT="/tmp/security-report-$(date +%Y%m%d).txt"
echo "===========================================" > $REPORT
echo "SECURITY REPORT - $(hostname)" >> $REPORT
echo "Date: $(date)" >> $REPORT
echo "===========================================" >> $REPORT
echo "" >> $REPORT
echo "=== FAIL2BAN STATUS ===" >> $REPORT
sudo fail2ban-client status >> $REPORT 2>&1
echo "" >> $REPORT
echo "=== CURRENT BANS ===" >> $REPORT
for JAIL in $(sudo fail2ban-client status | grep "Jail list" | cut -d: -f2 | tr -d ' ' | tr ',' ' '); do
echo "--- $JAIL ---" >> $REPORT
sudo fail2ban-client status $JAIL | grep -E "Currently banned|Banned IP list" >> $REPORT
done
echo "" >> $REPORT
echo "=== SSH ATTEMPTS (Last 24h) ===" >> $REPORT
sudo grep "$(date --date='24 hours ago' '+%b %e')" /var/log/secure | grep "Failed password" | wc -l >> $REPORT
echo "failed attempts" >> $REPORT
echo "" >> $REPORT
echo "=== SYSTEM UPTIME & LOAD ===" >> $REPORT
uptime >> $REPORT
echo "" >> $REPORT
echo "=== DISK USAGE ===" >> $REPORT
df -h / >> $REPORT
cat $REPORTMake it executable and schedule:
sudo chmod +x /usr/local/bin/security-report.sh
sudo crontab -e
Add:
0 6 * * * /usr/local/bin/security-report.sh | mail -s "Daily Security Report - $(hostname)" admin@yourdomain.comReal-Time Monitoring with ntfy.sh
# Create ntfy action for fail2ban
sudo nano /etc/fail2ban/action.d/ntfy.conf
[Definition]
actionban = curl -H "Title: 🚨 Fail2ban Alert" -H "Priority: high" -d "<name> banned <ip> for <failures> failures" https://ntfy.sh/your-server-alerts
actionunban = curl -H "Title: ✅ Fail2ban Unban" -H "Priority: low" -d "<name> unbanned <ip>" https://ntfy.sh/your-server-alertsEnable in jail.local:
action = ntfyComplete Hardening Checklist
Run this script to verify all layers:
#!/bin/bash
echo "=== iRedMail Hardening Audit ==="
echo ""

# Layer 1: SSL
echo "Layer 1: SSL/TLS"
openssl s_client -connect localhost:465 -servername mail.yourdomain.com 2>/dev/null | grep -q "verify return code: 0" && echo "✅ SSL valid" || echo "❌ SSL issue"
echo ""

# Layer 2: SASL
echo "Layer 2: SASL Authentication"
sudo postconf | grep -q "smtpd_sasl_auth_enable = yes" && echo "✅ SASL enabled" || echo "❌ SASL disabled"
echo ""

# Layer 3: Firewall
echo "Layer 3: Firewall"
sudo firewall-cmd --list-services | grep -q smtp-submission && echo "✅ SMTP submission service" || echo "❌ SMTP submission missing"
echo ""

# Layer 4: Fail2ban
echo "Layer 4: Fail2ban"
sudo systemctl is-active fail2ban >/dev/null && echo "✅ Fail2ban running" || echo "❌ Fail2ban not running"
echo ""

# Layer 5: Root Security
echo "Layer 5: Root SSH"
sudo grep -q "^PermitRootLogin no" /etc/ssh/sshd_config && echo "✅ Root SSH disabled" || echo "❌ Root SSH enabled"
echo ""

# Layer 6: Rate Limiting
echo "Layer 6: Rate Limiting"
sudo postconf | grep -q "smtpd_client_connection_rate_limit = 10" && echo "✅ Rate limiting configured" || echo "⚠️ Rate limiting not set"
echo ""

# Layer 7: Monitoring
echo "Layer 7: Monitoring"
sudo crontab -l 2>/dev/null | grep -q "security-report" && echo "✅ Daily reports configured" || echo "⚠️ Daily reports not set"
Conclusion
Your iRedMail server is now production-hardened with all 7 security layers:
| Layer | Component | Status |
|---|---|---|
| 1 | SSL/TLS | ✅ Let's Encrypt |
| 2 | SASL Authentication | ✅ Working from any IP |
| 3 | Firewall | ✅ Service-based rules |
| 4 | Fail2ban | ✅ Active with alerts |
| 5 | Root Security | ✅ SSH disabled |
| 6 | Rate Limiting | ✅ Prevents abuse |
| 7 | Monitoring | ✅ Daily reports + real-time |
Your email server is now secure, monitored, and ready for production use.
Social Media Graphics
YouTube Thumbnail Prompt:
A 7-layer shield with each layer labeled (SSL, SASL, Firewall, Fail2ban, Root, Rate Limit, Monitor). All layers glowing green with checkmarks. Text "7 Layers of Email Server Security". Dramatic dark background. 16:9.BLOG POST #8
Travel-Friendly Email Server (No IP Whitelisting)
Title:
"Run Your Own Email Server While Traveling: No Static IP Required"
Meta Description:
Stop whitelisting your changing IP address every time you travel. Configure SASL authentication to work from anywhere, set up proper email client settings, and use dynamic DNS if needed.
Suggested Featured Image Prompt:
A world map with a single server icon in the center. Travel route lines connecting from multiple continents (North America, Europe, Asia, Australia) all connecting to the central server. Each route has a small lock icon. Access from anywhere concept. Blue and green color scheme. 16:9 aspect ratio.Introduction (150 words)
Estimated reading time: 8 minutes
You're at an airport in Singapore. You need to send an important email. But Apple Mail shows: "Connection refused."
You log into your server and add your new IP address to the firewall whitelist. It works. But tomorrow you'll be in Tokyo, and you'll have to do it again.
This is the reality for many self-hosted email server administrators. The common "solution" of whitelisting IPs doesn't work for travelers.
The real solution? SASL authentication.
When properly configured, your email server should accept connections from ANY IP address, as long as the user provides valid credentials. No whitelisting needed.
In this guide, I'll show you how to configure your iRedMail server for global access, test authentication from anywhere, and set up dynamic DNS for domains without static IPs.
The Problem with IP Whitelisting
Many tutorials tell you to add your IP to mynetworks or firewall whitelist:
# Common but wrong approach for travelers
sudo firewall-cmd --add-rich-rule='rule family="ipv4" source address="YOUR_IP" accept'
This works for a static office IP, but fails for travelers because:
| Issue | Impact |
|---|---|
| IP changes constantly | Need to update every time |
| Hotel/Coffee shop WiFi | New IP at every location |
| Mobile hotspot | IP changes frequently |
| Roaming | Different IP per country |
The Solution: SASL Authentication
SASL (Simple Authentication and Security Layer) allows users to authenticate with username/password from any IP.
Verify SASL is Enabled
# Check current configuration
sudo postconf | grep smtpd_sasl_auth_enable
Expected:
smtpd_sasl_auth_enable = yesIf not enabled:
sudo postconf -e "smtpd_sasl_auth_enable = yes"
sudo postconf -e "smtpd_sasl_type = dovecot"
Configure the Auth Socket
sudo nano /etc/dovecot/conf.d/10-master.confEnsure this section exists:
service auth {
  unix_listener /var/spool/postfix/private/dovecot-auth {
    mode = 0666
    user = postfix
    group = postfix
  }
}
# Fix permissions
sudo mkdir -p /var/spool/postfix/private
sudo chown postfix:postfix /var/spool/postfix/private
sudo chmod 755 /var/spool/postfix/private
# Restart services
sudo systemctl restart dovecot postfixSet Postfix SASL Path
sudo postconf -e "smtpd_sasl_path = private/dovecot-auth"
sudo systemctl restart postfix
Testing SASL Authentication from Anywhere
Test 1: Local Test (On Server)
sudo doveadm auth test youruser@yourdomain.comTest 2: Remote Test (From Any Client)
From your laptop, phone, or any machine:
openssl s_client -connect mail.yourdomain.com:465 -crlfThen:
EHLO test
AUTH LOGIN
Encode your credentials:
echo -n "youruser@yourdomain.com" | base64
echo -n "yourpassword" | base64
Paste the encoded username, press Enter, then the encoded password.
Expected:
235 2.7.0 Authentication successfulTest 3: From Apple Mail
Use these settings:
| Setting | Value |
|---|---|
| Server | mail.yourdomain.com |
| Port | 465 |
| SSL | ON |
| Authentication | Password |
| Username | youruser@yourdomain.com |
Firewall Configuration (Allow All with Auth)
Your firewall should accept connections on SMTP ports from anywhere:
# Ensure proper services are enabled
sudo firewall-cmd --permanent --add-service=smtp-submission
sudo firewall-cmd --permanent --add-service=smtps

# Remove any IP-specific accept rules (they're not needed)
sudo firewall-cmd --permanent --remove-rich-rule='rule family="ipv4" source address="XXX" accept'

# Reload
sudo firewall-cmd --reload
Important: Never open port 25 for client submissions. Port 25 is for server-to-server only.
Dynamic DNS for Servers Without Static IP
If your server itself has a dynamic IP (home server), use Dynamic DNS.
Option 1: DuckDNS (Free)
# Install DuckDNS client
sudo dnf install git -y
git clone https://github.com/duckdd/duckdd.git
cd duckdd
sudo make install
Configure:
sudo nano /etc/duckdd.confdomain=yourdomain
token=your-duckdns-tokenRun:
sudo duckddOption 2: Cloudflare Dynamic DNS
# Install Cloudflare DDNS client
sudo dnf install python3-pip -y
pip3 install cloudflare-ddns
Configure:
sudo nano /etc/cloudflare-ddns.json{
"cloudflare": {
"email": "your-email@example.com",
"key": "your-global-api-key",
"zone": "yourdomain.com"
},
"a_records": [
{ "name": "mail", "ttl": 120 }
]
}Run as cron:
*/5 * * * * /usr/local/bin/cloudflare-ddns -c /etc/cloudflare-ddns.jsonOption 3: No-IP (Free with renewal)
# Install No-IP client
sudo dnf install make gcc -y
cd /usr/local/src
sudo wget https://www.noip.com/client/linux/noip-duc-linux.tar.gz
sudo tar xf noip-duc-linux.tar.gz
cd noip-2.1.9-1
sudo make
sudo make install
Email Client Configuration for Travel
Apple Mail (macOS/iOS)
| Setting | Value |
|---|---|
| Incoming Server | mail.yourdomain.com |
| Incoming Port | 993 |
| SSL | ON |
| Outgoing Server | mail.yourdomain.com |
| Outgoing Port | 465 |
| SSL | ON |
| Authentication | Password |
Outlook
| Setting | Value |
|---|---|
| Incoming Server | mail.yourdomain.com:993 |
| Encryption | SSL/TLS |
| Outgoing Server | mail.yourdomain.com:465 |
| Encryption | SSL/TLS |
Thunderbird
| Setting | Value |
|---|---|
| Incoming Server | mail.yourdomain.com |
| Incoming Port | 993 |
| Connection Security | SSL/TLS |
| Outgoing Server | mail.yourdomain.com |
| Outgoing Port | 465 |
| Connection Security | SSL/TLS |
Troubleshooting Travel Issues
Issue: Works at home, fails at hotel
Cause: Hotel network blocking SMTP ports
Solution: Use port 587 with STARTTLS instead of 465:
nc -zv mail.yourdomain.com 587Issue: Authentication fails from certain networks
Cause: Network firewall stripping authentication headers
Solution: Use different port (2525 if you have it configured)
Issue: Connection timeout
Cause: Hotel/Coffee shop captive portal
Solution: Complete portal login first, then retry
Security Considerations for Global Access
| Risk | Mitigation |
|---|---|
| Brute force attacks | Fail2ban with low maxretry (3-5) |
| Password guessing | Strong passwords, 2FA if possible |
| Botnet scanning | Fail2ban recidive jail (1-week ban) |
| Compromised credentials | Regular password rotation |
Monitoring Global Access
# Watch for auth failures from unusual locations
sudo tail -f /var/log/maillog | grep "authentication failed"

# Get geo-location of failed attempts (requires geoip)
sudo fail2ban-client status postfix | grep "Banned IP list"
Conclusion
You no longer need to whitelist your IP every time you travel:
- ✅ SASL authentication works from any IP
- ✅ No firewall whitelist needed
- ✅ Same email client settings work everywhere
- ✅ Dynamic DNS keeps your server reachable
- ✅ Fail2ban protects against brute force
Your email server is now truly global—accessible from any internet connection in the world.