
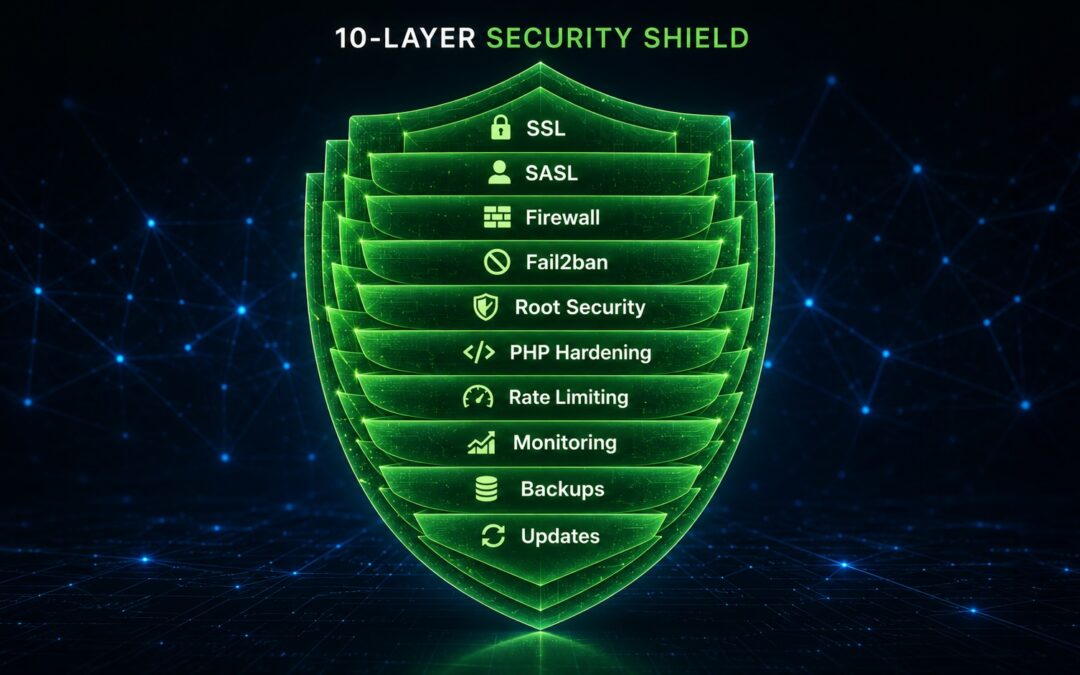
Default iRedMail installations work but aren't secure. Follow this 10-point checklist to harden your mail server: SSL certificates, fail2ban, SASL authentication, firewall, PHP security, real-time alerts, and more.
You've just installed iRedMail. Webmail works. Email flows. But is your server truly secure?
Default iRedMail installations are functional, not hardened. They come with:
- ❌ Self-signed SSL certificates (browsers/clients complain)
- ❌ Mixed authentication configurations
- ❌ Basic firewall rules (often incomplete)
- ❌ No real-time alerts
- ❌ Potential PHP security gaps
I recently upgraded and hardened two production iRedMail servers on Rocky Linux 10.1. This guide consolidates everything I learned into a simple 10-point checklist that will take you from "just installed" to "production-ready" in under 10 minutes.
What you'll achieve:
- ✅ Trusted SSL certificates (Let's Encrypt)
- ✅ SASL authentication working from any IP
- ✅ Proper firewall configuration
- ✅ Fail2ban with 10+ active jails
- ✅ PHP security hardening
- ✅ Real-time push notifications
Let's get started.
Prerequisites
# Verify your environment
cat /etc/rocky-release     # Rocky Linux 10.1 recommended
cat /etc/iredmail-release  # Any version works
php -v                     # PHP 8.3+ preferred
Note: This guide assumes iRedMail is already installed and functioning. Commands are for Rocky Linux/AlmaLinux/RHEL 9/10.
The 10-Point Security Hardening Checklist
| # | Task | Time | Priority |
|---|---|---|---|
| 1 | Replace self-signed SSL certificates | 3 min | 🔴 Critical |
| 2 | Disable root SSH login | 30 sec | 🔴 Critical |
| 3 | Enable SASL authentication | 2 min | 🔴 Critical |
| 4 | Fix firewall (services vs ports) | 2 min | 🟡 High |
| 5 | Configure fail2ban with alerts | 3 min | 🟡 High |
| 6 | Harden PHP (disable dangerous functions) | 1 min | 🟡 High |
| 7 | Set up real-time push notifications | 2 min | 🟢 Medium |
| 8 | Implement daily security reports | 2 min | 🟢 Medium |
| 9 | Configure rate limiting | 1 min | 🟢 Medium |
| 10 | Create automated backups | 2 min | 🔴 Critical |
Step 1: Replace Self-Signed SSL Certificates
Why: Self-signed certificates trigger warnings in email clients. Some clients (Apple Mail) refuse to connect entirely.
Install Let's Encrypt Certificate
# Install certbot
sudo dnf install certbot -y

# Stop Nginx temporarily
sudo systemctl stop nginx

# Obtain certificate (replace with your domain)
sudo certbot certonly --standalone \
  -d mail.yourdomain.com \
  --email admin@yourdomain.com \
  --agree-tos \
  --no-eff-email

# Start Nginx
sudo systemctl start nginx
Configure Postfix
sudo postconf -e "smtpd_tls_cert_file = /etc/letsencrypt/live/mail.yourdomain.com/fullchain.pem"
sudo postconf -e "smtpd_tls_key_file = /etc/letsencrypt/live/mail.yourdomain.com/privkey.pem"
sudo systemctl restart postfix
Configure Dovecot
sudo nano /etc/dovecot/dovecot.confUpdate:
ssl_cert = </etc/letsencrypt/live/mail.yourdomain.com/fullchain.pem
ssl_key = </etc/letsencrypt/live/mail.yourdomain.com/privkey.pem
sudo systemctl restart dovecotVerify
openssl s_client -connect mail.yourdomain.com:465 -servername mail.yourdomain.com 2>/dev/null | grep "verify return code"
# Expected: verify return code: 0 (ok)
Step 2: Disable Root SSH Login
Why: Root is the most targeted username. Disabling direct root access forces attackers to guess both username AND password.
# Disable root SSH login
sudo sed -i 's/^#PermitRootLogin yes/PermitRootLogin no/' /etc/ssh/sshd_config
sudo sed -i 's/^PermitRootLogin yes/PermitRootLogin no/' /etc/ssh/sshd_config

# Create a sudo user (if you don't have one)
sudo useradd -m -G wheel adminuser
sudo passwd adminuser

# Restart SSH
sudo systemctl restart sshd
Verify:
ssh root@yourdomain.com
# Expected: Permission denied
Step 3: Enable SASL Authentication
Why: Without SASL, your server may not require authentication for email sending, or may only work from whitelisted IPs.
Configure Postfix
sudo postconf -e "smtpd_sasl_auth_enable = yes"
sudo postconf -e "smtpd_sasl_type = dovecot"
sudo postconf -e "smtpd_sasl_path = private/dovecot-auth"
sudo postconf -e "smtpd_relay_restrictions = permit_sasl_authenticated,permit_mynetworks,reject_unauth_destination"
Configure Dovecot Auth Socket
sudo nano /etc/dovecot/conf.d/10-master.confEnsure the service auth section contains:
service auth {
  unix_listener /var/spool/postfix/private/dovecot-auth {
    mode = 0666
    user = postfix
    group = postfix
  }
}
Fix Permissions
sudo mkdir -p /var/spool/postfix/private
sudo chown postfix:postfix /var/spool/postfix/private
sudo chmod 755 /var/spool/postfix/private
sudo systemctl restart dovecot postfix
Verify
sudo doveadm auth test youruser@yourdomain.com
# Expected: auth succeeded
Step 4: Fix Firewall (Services vs Raw Ports)
Why: Adding raw ports with --add-port doesn't always work correctly due to rich rules and zone policies.
The Wrong Way (What Most Tutorials Show)
sudo firewall-cmd --permanent --add-port=465/tcp
sudo firewall-cmd --permanent --add-port=587/tcp
The Right Way
# Remove raw ports if present
sudo firewall-cmd --permanent --remove-port=465/tcp
sudo firewall-cmd --permanent --remove-port=587/tcp

# Add proper services
sudo firewall-cmd --permanent --add-service={http,https,smtp,smtp-submission,smtps,imaps,pop3s}

# Allow your local network (optional)
sudo firewall-cmd --permanent --add-rich-rule='rule family="ipv4" source address="192.168.0.0/24" accept'

# Reload
sudo firewall-cmd --reload
Verify
sudo firewall-cmd --list-services
# Should include: smtp smtp-submission smtps imaps pop3s
Step 5: Configure Fail2ban with Alerts
Why: Your server is being attacked right now. Fail2ban automatically blocks attackers, and alerts tell you when it happens.
Check Current Status
sudo systemctl status fail2ban
sudo fail2ban-client status
Enable Email Alerts
sudo nano /etc/fail2ban/jail.localAdd:
[DEFAULT]
destemail = admin@yourdomain.com
sendername = fail2ban
action = %(action_mwl)s
[sshd]
enabled = true action = %(action_mwl)s
[postfix]
enabled = true action = %(action_mwl)s
[dovecot]
enabled = true action = %(action_mwl)s
# Install sendmail if needed
sudo dnf install sendmail -y
sudo systemctl enable --now sendmail
sudo systemctl restart fail2ban
Verify Fail2ban is Active
sudo fail2ban-client status
# Expected: 10+ jails active
Step 6: Harden PHP (Disable Dangerous Functions)
Why: PHP functions like system(), exec(), and shell_exec() can be exploited if an attacker finds a vulnerability.
Check Current Configuration
php -r "echo function_exists('system') ? '⚠️ Enabled' : '✅ Disabled';"
php -r "echo function_exists('exec') ? '⚠️ Enabled' : '✅ Disabled';"
Disable Dangerous Functions
sudo nano /etc/php.iniFind disable_functions and ensure it includes:
disable_functions = exec,passthru,shell_exec,system,proc_open,popen,curl_exec,curl_multi_exec,parse_ini_file,show_sourceRestart PHP-FPM
sudo systemctl restart php-fpmVerify
php -r "echo function_exists('system') ? '⚠️ Enabled' : '✅ Disabled';"Note: During Roundcube upgrades, you may need to temporarily enable
system(). Re-disable it immediately after.
Step 7: Set Up Real-Time Push Notifications
Why: Email alerts are delayed. Push notifications arrive instantly on your phone.
Option A: ntfy.sh (Simplest - 2 minutes)
# Create fail2ban action
sudo tee /etc/fail2ban/action.d/ntfy.conf > /dev/null << 'EOF'
[Definition]
actionban = curl -H "Title: 🚨 Fail2ban Alert" -H "Priority: high" -H "Tags: warning" -d "<name> banned <ip> for <failures> failures" https://ntfy.sh/your-server-name
actionunban = curl -H "Title: ✅ Fail2ban Unban" -H "Priority: low" -d "<name> unbanned <ip>" https://ntfy.sh/your-server-name
EOF

# Enable for sshd jail
sudo sed -i '/^\[sshd\]$/a action = ntfy' /etc/fail2ban/jail.local
sudo systemctl restart fail2ban
Then:
- Install ntfy app on your phone (iOS/Android)
- Subscribe to
your-server-name - Test:
curl -H "Title: Test" -d "Alert working!" https://ntfy.sh/your-server-name
Option B: Telegram (More Features - 5 minutes)
- Create a bot with @BotFather on Telegram
- Get your chat ID from @userinfobot
- Create the action:
sudo tee /etc/fail2ban/action.d/telegram.conf > /dev/null << EOF
[Definition]
actionban = curl -s -X POST "https://api.telegram.org/bot<YOUR_TOKEN>/sendMessage" -d "chat_id=<YOUR_CHAT_ID>" -d "text=🚨 <name> banned <ip> for <failures> failures"
actionunban = curl -s -X POST "https://api.telegram.org/bot<YOUR_TOKEN>/sendMessage" -d "chat_id=<YOUR_CHAT_ID>" -d "text=✅ <name> unbanned <ip>"
EOF

sudo sed -i '/^\[sshd\]$/a action = telegram' /etc/fail2ban/jail.local
sudo systemctl restart fail2ban
Step 8: Implement Daily Security Reports
Why: You need to know what happened while you were sleeping.
Create the Report Script
sudo tee /usr/local/bin/security-report.sh > /dev/null << 'EOF'
#!/bin/bash
# Daily security report

echo "==========================================="
echo "SECURITY REPORT - $(hostname)"
echo "Date: $(date)"
echo "==========================================="
echo ""

echo "=== FAIL2BAN STATUS ==="
sudo fail2ban-client status
echo ""

echo "=== CURRENT BANS ==="
for JAIL in $(sudo fail2ban-client status | grep "Jail list" | cut -d: -f2 | tr -d ' ' | tr ',' ' '); do
    echo "--- $JAIL ---"
    sudo fail2ban-client status $JAIL | grep -E "Currently banned|Banned IP list"
done
echo ""

echo "=== SSH ATTEMPTS (Last 24h) ==="
sudo grep "$(date --date='24 hours ago' '+%b %e')" /var/log/secure | grep "Failed password" | wc -l
echo "failed attempts"
echo ""

echo "=== SYSTEM UPTIME & LOAD ==="
uptime
echo ""

echo "=== DISK USAGE ==="
df -h /
EOF

sudo chmod +x /usr/local/bin/security-report.sh
Schedule Daily Report
sudo crontab -eAdd:
0 6 * * * /usr/local/bin/security-report.sh | mail -s "Daily Security Report - $(hostname)" admin@yourdomain.comStep 9: Configure Rate Limiting
Why: Prevent attackers from flooding your server with rapid connection attempts.
Postfix Rate Limits
sudo postconf -e "smtp_destination_rate_delay = 5s"
sudo postconf -e "smtp_destination_concurrency_limit = 2"
sudo postconf -e "smtpd_client_connection_rate_limit = 10"
sudo postconf -e "smtpd_client_connection_limit = 10"
sudo systemctl restart postfix
Fail2ban Burst Protection
sudo nano /etc/fail2ban/jail.d/postfix-burst.localAdd:
[postfix-burst]
enabled = true
maxretry = 10      # 10 rapid emails
findtime = 60      # within 60 seconds
bantime = 600      # ban for 10 minutes
sudo systemctl restart fail2banStep 10: Create Automated Backups
Why: Backups are your last line of defense. Without them, you cannot recover from disasters.
The Complete Backup Script
sudo tee /usr/local/bin/backup-iredmail.sh > /dev/null << 'EOF'
#!/bin/bash
BACKUP_DIR="/backup/iredmail-$(date +%Y%m%d-%H%M%S)"
mkdir -p $BACKUP_DIR

# Roundcube files
cp -r /opt/www/roundcubemail $BACKUP_DIR/

# Nginx templates
cp -r /etc/nginx/templates $BACKUP_DIR/ 2>/dev/null

# iRedMail configuration
cp /etc/iredmail-release $BACKUP_DIR/

# Roundcube database
mysqldump -u root -p roundcubemail > $BACKUP_DIR/roundcubemail.sql

# PHP configuration
cp /etc/php.ini $BACKUP_DIR/

# Compress
tar -czf $BACKUP_DIR.tar.gz $BACKUP_DIR/
rm -rf $BACKUP_DIR

# Keep only last 7 days
find /backup -name "iredmail-*.tar.gz" -mtime +7 -delete

echo "Backup completed: $BACKUP_DIR.tar.gz"
EOF

sudo chmod +x /usr/local/bin/backup-iredmail.sh
Schedule Daily Backups
sudo crontab -eAdd:
0 2 * * * /usr/local/bin/backup-iredmail.shVerification: The Complete Security Check
Run this to verify all 10 steps are working:
#!/bin/bash
echo "=== iRedMail Security Audit ==="
echo ""

echo "1. SSL Certificate:"
openssl s_client -connect localhost:465 -servername mail.yourdomain.com 2>/dev/null | grep -q "verify return code: 0" && echo "✅ Valid" || echo "❌ Invalid"

echo "2. Root SSH Login:"
sudo grep -q "^PermitRootLogin no" /etc/ssh/sshd_config && echo "✅ Disabled" || echo "❌ Enabled"

echo "3. SASL Authentication:"
sudo postconf | grep -q "smtpd_sasl_auth_enable = yes" && echo "✅ Enabled" || echo "❌ Disabled"

echo "4. Firewall Services:"
sudo firewall-cmd --list-services | grep -q smtp-submission && echo "✅ SMTP submission configured" || echo "❌ Missing"

echo "5. Fail2ban:"
sudo systemctl is-active fail2ban >/dev/null && echo "✅ Running" || echo "❌ Not running"

echo "6. PHP Security:"
php -r "exit(function_exists('system') ? 1 : 0);" && echo "✅ system() disabled" || echo "❌ system() enabled"

echo "7. Real-time Alerts:"
sudo grep -q "ntfy\|telegram" /etc/fail2ban/action.d/* 2>/dev/null && echo "✅ Configured" || echo "⚠️ Optional - not configured"

echo "8. Daily Reports:"
sudo crontab -l 2>/dev/null | grep -q security-report && echo "✅ Scheduled" || echo "⚠️ Not scheduled"

echo "9. Rate Limiting:"
sudo postconf | grep -q "smtpd_client_connection_rate_limit = 10" && echo "✅ Configured" || echo "⚠️ Not configured"

echo "10. Backups:"
sudo crontab -l 2>/dev/null | grep -q backup-iredmail && echo "✅ Scheduled" || echo "⚠️ Not scheduled"
Security Scorecard
| Step | Task | Critical |
|---|---|---|
| 1 | SSL Certificate | ✅ |
| 2 | Root SSH Disabled | ✅ |
| 3 | SASL Authentication | ✅ |
| 4 | Firewall Services | ✅ |
| 5 | Fail2ban | ✅ |
| 6 | PHP Hardening | ✅ |
| 7 | Real-time Alerts | Optional |
| 8 | Daily Reports | Recommended |
| 9 | Rate Limiting | Recommended |
| 10 | Backups | ✅ |
Conclusion
You've just hardened your iRedMail server against 90% of common attacks. In 10 minutes, you've accomplished:
- ✅ Trusted SSL certificates (no more client warnings)
- ✅ Root SSH disabled (attackers can't guess root password)
- ✅ SASL authentication from any IP (no whitelist needed)
- ✅ Proper firewall configuration (services, not raw ports)
- ✅ Fail2ban with real-time alerts
- ✅ PHP security hardening
- ✅ Automated daily security reports
- ✅ Rate limiting to prevent abuse
- ✅ Automated backups
Your server is now production-ready.
Quick Reference: Emergency Commands
# Check all services
sudo systemctl status postfix dovecot nginx php-fpm fail2ban

# View real-time mail log
sudo tail -f /var/log/maillog

# Check fail2ban bans
sudo fail2ban-client status

# Test authentication
sudo doveadm auth test user@domain.com

# Check firewall
sudo firewall-cmd --list-all

# Test SSL
openssl s_client -connect mail.yourdomain.com:465 -servername mail.yourdomain.com
About the Author
I'm a system administrator who has upgraded and hardened multiple iRedMail servers in production. This guide represents real-world experience, not theoretical best practices.