This guide explains how to securely configure a Rocky Linux 10 KVM virtualization host with proper network segmentation, SSH hardening, and intrusion protection using Fail2Ban and firewalld.
Before You Start (IMPORTANT SAFETY RULE)
Never apply firewall or SSH restrictions without at least ONE of these active:
- Existing SSH session (do not close it)
- Physical access / IPMI / console
- Provider rescue mode
This prevents accidental lockouts.
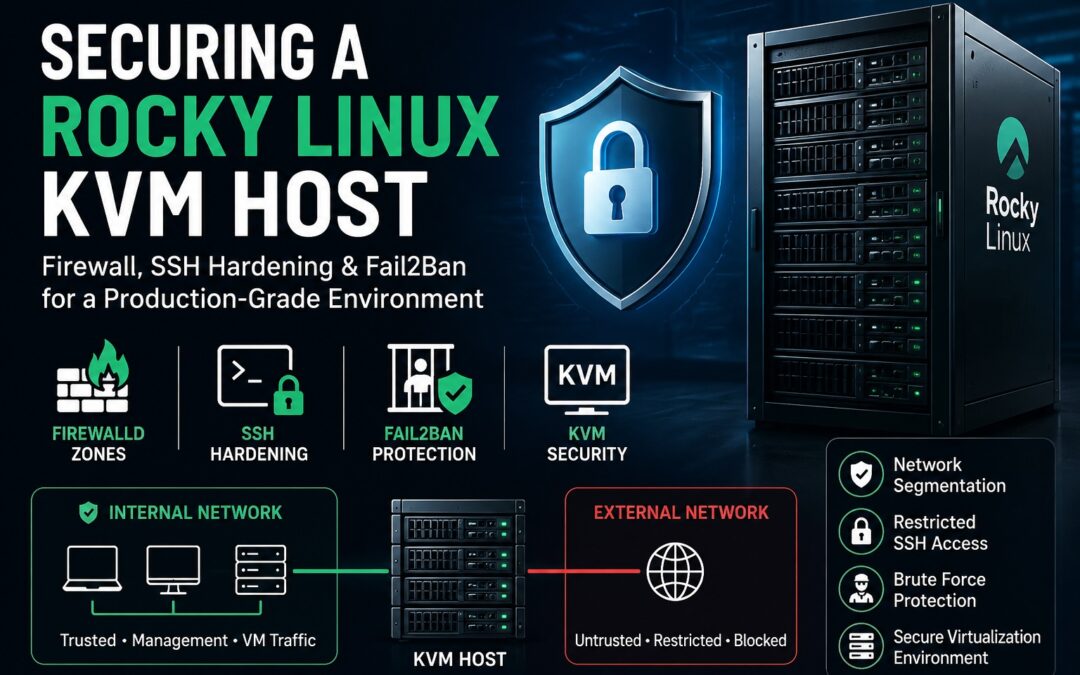
Step 1 — Understand Your Network Design
Start by identifying your network interfaces:
ip a
nmcli device status
bridge link
You should clearly define:
br0→ Internal / LAN / Management networkbr1→ External / WAN / untrusted network
Example architecture:
| Bridge | Role |
|---|---|
| br0 | Trusted internal network |
| br1 | Internet-facing network |
Step 2 — Verify Bridge Membership
Confirm which NIC belongs to which bridge:
ls /sys/class/net/br0/brif/
ls /sys/class/net/br1/brif/
You should see:
- br0 → internal NIC + VM interfaces
- br1 → WAN NIC
Step 3 — Assign Firewalld Zones Properly
Check current zones:
firewall-cmd --get-active-zonesThen assign correctly:
Internal (trusted LAN)
firewall-cmd --permanent --zone=internal --change-interface=br0WAN (untrusted)
firewall-cmd --permanent --zone=drop --change-interface=br1Reload firewall:
firewall-cmd --reloadStep 4 — Configure SSH Securely
Edit SSH configuration:
nano /etc/ssh/sshd_configRecommended secure settings:
Port 2525
Protocol 2
PermitRootLogin no
PasswordAuthentication no
PubkeyAuthentication yes
Restart SSH:
systemctl restart sshdStep 5 — Restrict SSH to Internal Network Only
Allow SSH only in internal zone:
firewall-cmd --permanent --zone=internal --add-port=2525/tcp
firewall-cmd --reload
Ensure WAN is blocked:
firewall-cmd --zone=drop --list-allThere should be:
- ❌ no SSH
- ❌ no ports
Step 6 — Verify SSH Exposure
Check listening ports:
ss -tulpn | grep sshdExpected:
- SSH listens on 2525
- Firewall restricts external access
Step 7 — Install and Configure Fail2Ban
Install:
dnf install fail2ban -y
systemctl enable --now fail2ban
Configure SSH jail:
nano /etc/fail2ban/jail.d/sshd.localAdd:
[sshd]
enabled = true
backend = systemd
port = 2525
mode = aggressive

maxretry = 3
findtime = 10m
bantime = 24h

banaction = firewallcmd-ipset
Restart:
systemctl restart fail2banCheck status:
fail2ban-client status sshdStep 8 — Secure Virtual Machines (KVM Layer)
Ensure VM consoles are NOT exposed externally:
Check VNC binding:
virsh dumpxml VM_NAME | grep graphicsCorrect configuration:
<graphics type='vnc' listen='127.0.0.1'>This ensures:
- No external VNC access
- Only local tunneling allowed
Step 9 — Validate Firewall Zones
Final check:
firewall-cmd --list-all-zonesExpected design:
internal (br0)
- SSH allowed
- VM management allowed
drop (br1)
- No services
- No ports
Step 10 — Safe Remote Access Strategy
Never expose SSH directly to WAN in production.
Recommended secure access model:
✔ Best Practice:
- WireGuard VPN → internal network → SSH
OR
✔ Alternative:
- Bastion/jump server
- Provider console access
Step 11 — Final Security Validation
Run:
firewall-cmd --get-active-zones
ss -tulpn | grep sshd
fail2ban-client status sshd
Confirm:
- br0 = internal
- br1 = drop
- SSH only reachable internally
- Fail2Ban active
Final Architecture Summary
Internet
   ↓
[ br1 - DROP zone ]
   ↓ (blocked)
KVM Host
   ↑
[ br0 - INTERNAL zone ]
   ├── SSH (2525)
   ├── VM management
   └── Fail2Ban protection
📌 Key Takeaway
Security is not just about SSH passwords—it is about network isolation first, authentication second.