
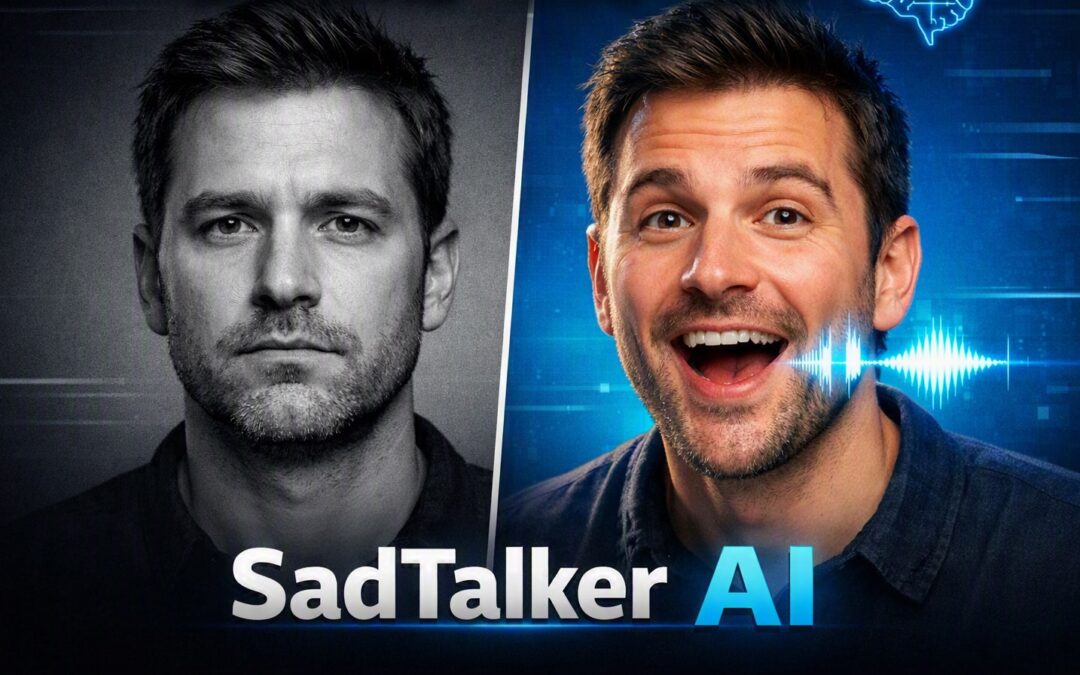
From Zero to Realistic Talking Head Videos
After countless errors, dependency hell, and a successful final render, I've documented the entire process to save you from the pain we went through. This is the guide I wish I had.
What is SadTalker?
SadTalker is an open-source AI tool that creates realistic talking head videos from a single portrait image and an audio file. It works by learning the relationship between audio and facial motion, then animating a static image with natural head movements and expressions synchronized to speech.
The name stands for "Stylized Audio-Driven Single Image Talking Face Animation" – and it delivers on that promise surprisingly well.
What it does:
- Takes one photo + one audio file → generates a talking video
- Works on real people's photos (anime/art style support is still in development)
- Supports face enhancement via GFPGAN for better quality
- Can process full-body images with the
--stillflag
Hardware Requirements
Minimum vs Recommended
| Component | Minimum | Recommended |
|---|---|---|
| GPU | GTX 1060 (4GB VRAM) | NVIDIA RTX 3060 or higher |
| RAM | 8 GB | 16 GB+ |
| Storage | ~5 GB (checkpoints + dependencies) | 10 GB+ |
| OS | Windows 10/11, macOS, Ubuntu Linux | - |
| Python | 3.8 | 3.9 |
Platform-Specific Notes
NVIDIA GPU Users:
- CUDA 11.3 is recommended for PyTorch compatibility
- Higher VRAM allows larger batch sizes = faster processing
- On a standard GPU, generating a 10-second video takes about 30 seconds
Apple Silicon (M1/M2/M3/M4/M5) Users:
- SadTalker runs on Apple Silicon with some CPU limitations
- The Face Renderer uses Conv3D operations not fully supported by PyTorch MPS yet
- Expect 4-8 seconds per frame with CPU optimizations (5-10x improvement over original 40+ seconds)
Memory Management Tip:
If you encounter CUDA out of memory errors (common with older GPUs), set this environment variable:
# Windows
set PYTORCH_CUDA_ALLOC_CONF=max_split_size_mb:128
python inference.py ...

# Linux/macOS
export PYTORCH_CUDA_ALLOC_CONF=max_split_size_mb:128
python inference.py ...
Installation Guide (macOS)
Step 1: Install Homebrew
/bin/bash -c "$(curl -fsSL https://raw.githubusercontent.com/Homebrew/install/HEAD/install.sh)"Step 2: Install Conda
curl -O https://repo.anaconda.com/miniconda/Miniconda3-latest-MacOSX-arm64.sh
bash Miniconda3-latest-MacOSX-arm64.sh
Step 3: Clone SadTalker
git clone https://github.com/OpenTalker/SadTalker.git
cd SadTalker
Step 4: Create Python Environment
conda create -n sadtalker python=3.9 -y
conda activate sadtalker
Note: Python 3.8 is officially recommended, but 3.9 works and avoids some compatibility issues.
Step 5: Install PyTorch
For Apple Silicon:
pip install torch torchvision torchaudioFor NVIDIA GPU (CUDA 11.3):
pip install torch==1.12.1+cu113 torchvision==0.13.1+cu113 torchaudio==0.12.1 --extra-index-url https://download.pytorch.org/whl/cu113Step 6: Install FFmpeg
# macOS
brew install ffmpeg
# or via conda
conda install ffmpeg
Windows users: Add ffmpeg to your %PATH%.
Step 7: Install Dependencies
pip install numpy==1.23.5
pip install -r requirements.txt
For macOS only (fixes dlib issues on Apple Silicon):
pip install dlibStep 8: Download Pre-trained Models
Option A: Manual Download
mkdir -p checkpoints
cd checkpoints

curl -L -O https://github.com/OpenTalker/SadTalker/releases/download/v0.0.2/SadTalker_V0.0.2_256.safetensors
curl -L -O https://github.com/OpenTalker/SadTalker/releases/download/v0.0.2/mapping_00229-model.pth.tar
curl -L -O https://github.com/TencentARC/GFPGAN/releases/download/v1.3.0/GFPGANv1.3.pth
curl -L -O https://github.com/OpenTalker/SadTalker/releases/download/v0.0.2/wav2lip_gan.pth
Option B: Using Hugging Face (Community Repository)
python -c "
from huggingface_hub import snapshot_download
snapshot_download(
    repo_id='ruslanmv/avatar-renderer',
    local_dir='./checkpoints'
)
"
Step 9: Fix Common Import Errors
Problem: ModuleNotFoundError: No module named 'basicsr.utils'
Solution: Install basicsr from GitHub:
pip uninstall basicsr -y
pip install git+https://github.com/xinntao/BasicSR.git
Problem: from torchvision.transforms.functional_tensor import rgb_to_grayscale fails
Solution: Fix the import path in basicsr:
sed -i '' 's/from torchvision.transforms.functional_tensor import rgb_to_grayscale/from torchvision.transforms.functional import rgb_to_grayscale/g' $(python -c "import basicsr; import os; print(os.path.dirname(basicsr.__file__))")/data/degradations.pyProblem: ModuleNotFoundError: No module named 'gfpgan' or facexlib
Solution: Install the missing packages:
pip install gfpgan facexlibUsing SadTalker: Command Reference
Basic Usage
export KMP_DUPLICATE_LIB_OK=TRUE
python inference.py --driven_audio your_audio.wav --source_image your_image.jpg --enhancer gfpgan
Advanced Configuration Parameters
Preprocessing Modes (--preprocess):
| Mode | Best For | Description |
|---|---|---|
crop (default) | Portrait images | Crops to face region for best facial animation |
resize | ID photos, close-ups | Resizes entire image; good for close-ups only |
full | Full-body images | Processes full image; use with --still |
Examples:
# Full-body image with reduced head motion
python inference.py --driven_audio audio.wav --source_image full_body.jpg --preprocess full --still --enhancer gfpgan

# ID photo resized
python inference.py --driven_audio audio.wav --source_image id_photo.jpg --preprocess resize --enhancer gfpgan
Enhancement Options
| Flag | Effect |
|---|---|
--enhancer gfpgan | Face restoration enhancement |
--enhancer RestoreFormer | Alternative face restoration |
--background_enhancer realesrgan | Enhances full video background |
Fine-Tuning Controls
| Parameter | Purpose | Example |
|---|---|---|
--still | Reduces head motion, uses same pose as original | Good for professional presentations |
--expression_scale | Controls emotion intensity (default: 1.0) | Higher values = more expressive |
--ref_eyeblink video.mp4 | Reference video for natural eye blinking | More natural eyebrow movement |
--ref_pose video.mp4 | Reference video for head pose | Borrow pose from another video |
Free-View 4D Talking Head
Generate a talking head with controlled head poses:
python inference.py --driven_audio audio.wav \
                    --source_image image.png \
                    --input_yaw -20 30 10 \
                    --input_pitch 0 15 0 \
                    --input_roll 0 0 0
Troubleshooting Common Issues
Face Detection Failures
Error: raise 'can not detect the landmark from source image'
Solutions:
- Use a clear, front-facing photo
- Try different preprocessing modes:
--preprocess resizeor--preprocess full - For full-body images, always use
--still - Resize your image to 512x512 first
File Corruption Errors
Error: RuntimeError: unexpected EOF, expected 237192 more bytes. The file might be corrupted.
Solution: The model files are not fully downloaded. Re-download the checkpoints and place them in the right location.
OpenMP Errors on macOS
Error: OMP: Error #15: Initializing libomp.dylib, but found libomp.dylib already initialized
Solution:
export KMP_DUPLICATE_LIB_OK=TRUECUDA Memory Errors
Solution:
# macOS/Linux
export PYTORCH_CUDA_ALLOC_CONF=max_split_size_mb:128
python inference.py ...

# Windows
set PYTORCH_CUDA_ALLOC_CONF=max_split_size_mb:128
python inference.py ...
Dlib Errors on Apple Silicon
Error: Illegal Hardware Error on Mac M1
Solution: Reinstall dlib individually:
pip install dlibTips for Best Quality Videos
Input Image Guidelines
- Use real person photos (anime support not yet released)
- Choose high-quality, well-lit, front-facing portraits
- Clear facial features are essential
- Avoid profile shots
Audio Guidelines
- Use WAV format when possible (MP3 also supported)
- Ensure clear, well-articulated speech
- Keep audio under 1 minute for fastest processing
Optimization Strategies
- For speed: Use
--stillflag and--preprocess resize - For quality: Use
--enhancer gfpganand--size 512 - For full-body: Use
--preprocess full --still
Alternative: Use the WebUI
If command-line feels overwhelming:
python app_sadtalker.py
# Then open http://127.0.0.1:7860 in your browser
Running on Google Colab (Free GPU)
If you don't have a local GPU:
- Open the official SadTalker Colab notebook
- Select Runtime → Change runtime type → GPU
- Run all cells (~5 minutes setup)
- Upload your image and audio
- Download the generated video
Quick Command Reference
| Task | Command |
|---|---|
| Basic generation | python inference.py --driven_audio audio.wav --source_image image.jpg --enhancer gfpgan |
| Full-body image | python inference.py --driven_audio audio.wav --source_image full_body.jpg --preprocess full --still --enhancer gfpgan |
| Launch WebUI | python app_sadtalker.py |
| With expression control | python inference.py --driven_audio audio.wav --source_image image.jpg --expression_scale 1.5 --enhancer gfpgan |
| Free-view 4D | python inference.py --driven_audio audio.wav --source_image image.png --input_yaw -20 30 10 |
Final Notes
SadTalker is a powerful but sometimes finicky tool. The keys to success are:
- Use the right Python version (3.8 or 3.9)
- Download all checkpoints fully (check file sizes!)
- Use clear, front-facing images
- Convert audio to WAV format
- Be patient – the first run downloads models
The quality of your output is directly tied to the quality of your input materials. Good photos and clear audio make a massive difference.
Happy creating!