Are you a cybersecurity enthusiast or penetration tester looking to run Kali Linux directly on your Mac hardware? While virtual machines are convenient, nothing beats the performance of a bare-metal installation. This comprehensive guide will walk you through installing Kali Linux natively on Intel-based Macs.
⚠️ Important: Check Your Mac Compatibility First
Before we begin, you must determine your Mac’s hardware, as this dictates your installation options :
| Mac Hardware | Bare-Metal Installation | Recommended Approach |
|---|---|---|
| Apple Silicon (M1/M2/M3) | Not Possible | Virtualization (UTM or Parallels) |
| Intel with T2 Chip | Difficult/Complex | Virtualization is much easier |
| Intel (Pre-T2) | Yes, Possible | Follow this guide! |
This guide is for Intel-based Macs (pre-T2 models like 2011 Mac Mini or 2014 MacBook Air)
📋 Prerequisites
Before starting, ensure you have:
- ✅ An Intel-based Mac (preferably pre-T2 chip)
- ✅ USB drive (4GB or larger)
- ✅ Backup of all important data (this process ERASES your drive)
- ✅ Stable internet connection
Step 1: Download Kali Linux ISO
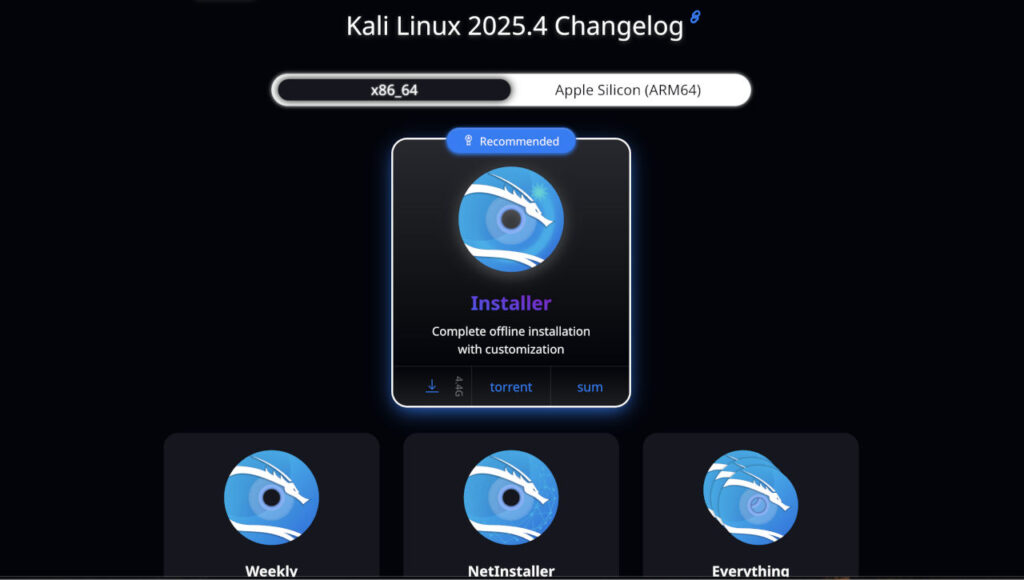
- Open your browser and navigate to the official Kali Linux website (kali.org)
- Click on “DOWNLOAD”
- Select “Bare Metal” version
- Choose the Intel/AMD64 (64-bit) ISO image
- For faster download, select the torrent option if available
Step 2: Prepare Your USB Drive
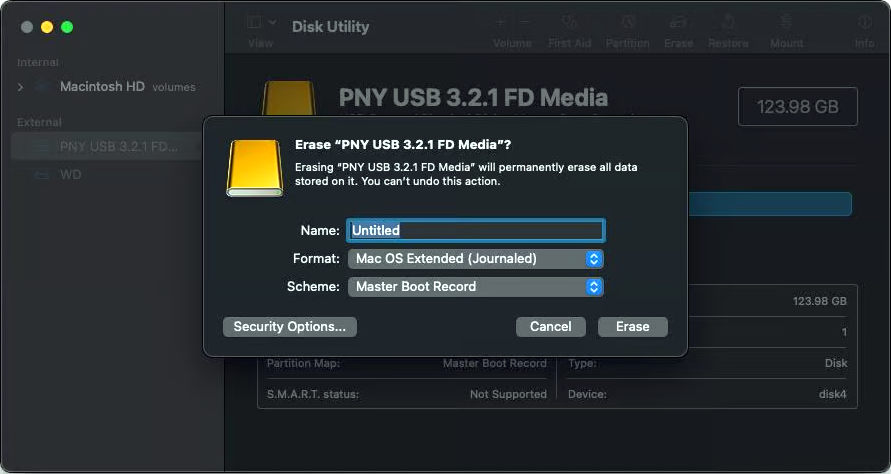
- Insert your USB drive into your Mac
- Open Disk Utility (Applications > Utilities)
- Select your USB drive from the left sidebar
- Click “Erase” and format as “Mac OS Extended (Journaled)”
- Name it something memorable like “KALI-USB”
Step 3: Create Bootable USB Using Terminal
- Open Terminal (Applications > Utilities)
- Identify your USB drive by running:
diskutil list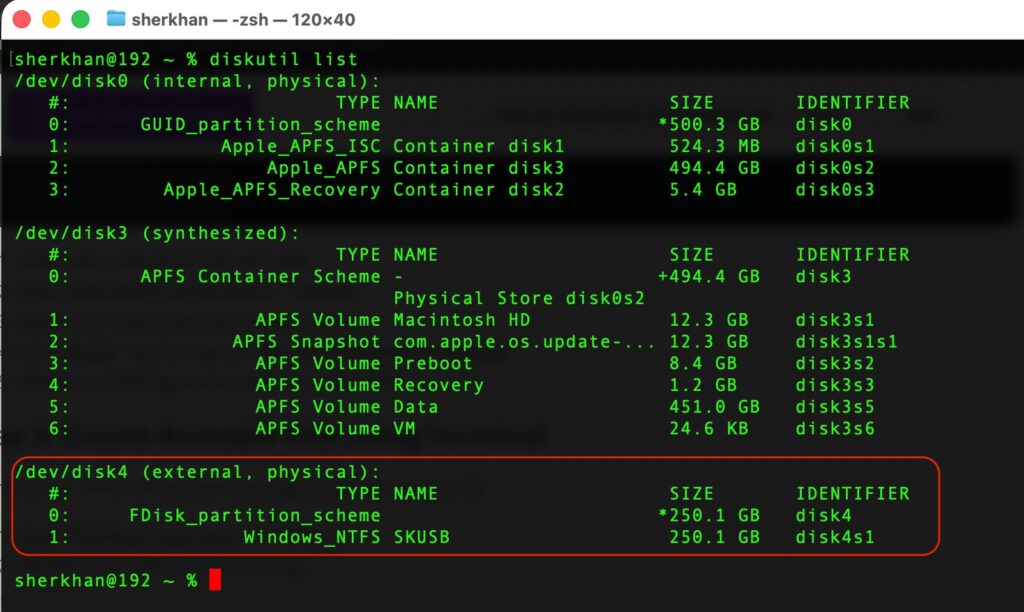
- Locate your USB drive (usually the smallest one, like /dev/disk2)
- Unmount the USB drive (replace N with your USB disk number):
diskutil unmountDisk /dev/disk{N}- Navigate to your Downloads folder:
cd ~/Downloads - Write the Kali ISO to your USB drive (this takes 15-30 minutes):
sudo dd if=kali-linux-XXXX.X-installer-amd64.iso of=/dev/disk{N} bs=1m status=progressReplace XXXX.X with your version number and {N} with your disk number - When complete, eject the drive:bashsudo diskutil eject /dev/disk{N}

Step 4: Boot from USB Drive
![Image: Mac startup screen with Option key being pressed]
- Insert the bootable USB drive into your Mac
- Restart your computer
- Immediately press and hold the Option (⌥) key
- Continue holding until you see the startup manager screen
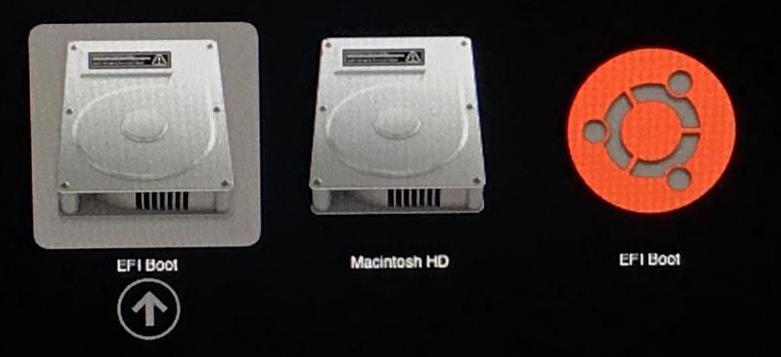
You should see two yellow icons :
- “EFI Boot” – For UEFI booting (try this first)
- “Windows” – Actually represents non-EFI/BIOS boot for Kali
- First, try selecting “EFI Boot” using arrow keys and press Enter
- If the system hangs, restart and try the “Windows” icon instead
Step 5: Start Kali Installer
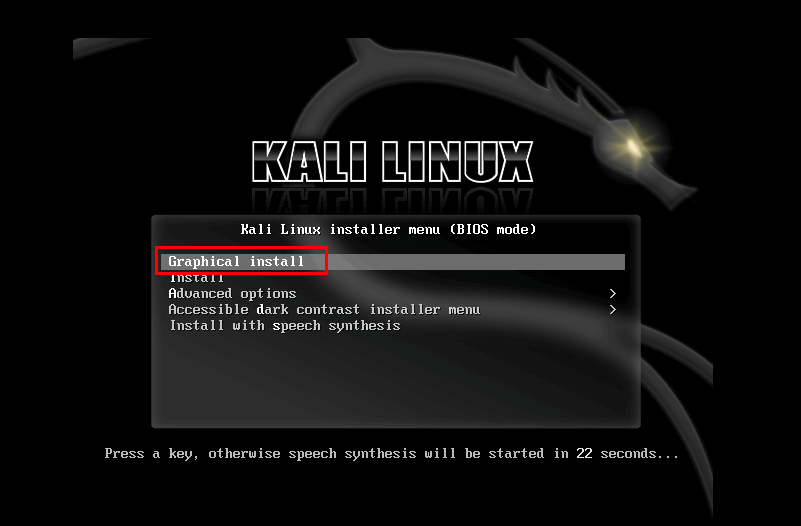
Once booted from USB, you’ll see the Kali boot menu:
- Select your language and click Continue
- Select your location and click Continue
- Select your keyboard layout and click Continue
Step 6: Configure User Account
![Image: User account setup screen – full name field]
- Enter your full name and click Continue
- Enter a username and click Continue
- Create a strong password and confirm it
Step 7: Partition Your Disk (⚠️ Critical Step)
This is where macOS will be erased, so double-check your backups!
- Select “Guided – use entire disk”
- Select your Mac’s internal hard drive
- Choose “All files in one partition” for simplicity
- Review the changes – the installer will delete all existing partitions
- Select “Yes” to write changes and begin installation
Step 8: Install GRUB Bootloader
- Select your main hard disk (e.g.,
/dev/sda), not a partition - Click Continue
Step 9: Complete Installation
- Wait for the installation to complete
- When prompted, select “Continue” to reboot
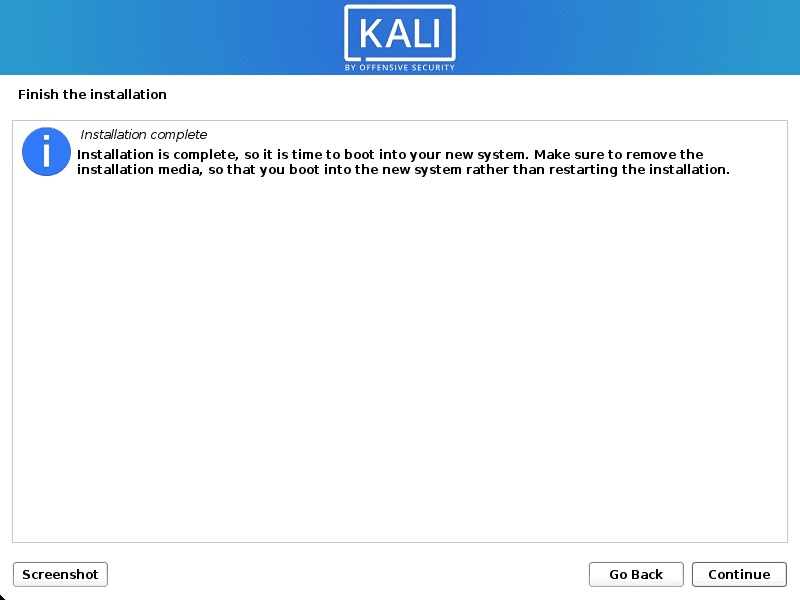
- Remove the USB drive when prompted
- Press Enter to reboot
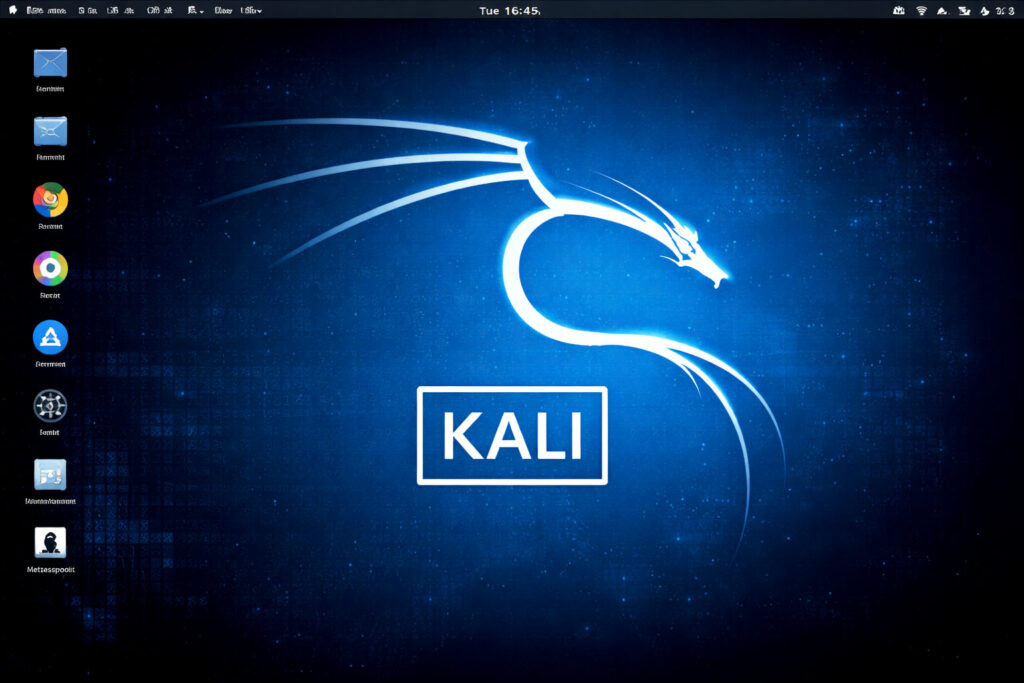
Step 10: First Boot into Kali Linux

Your Mac should now boot into GRUB:
- Select the default Kali Linux option
- Wait for the system to start
- Log in with the username and password you created during setup
- Welcome to Kali Linux! 🎉
Post-Installation: First Things to Do
Update Your System
Open Terminal and run:
sudo apt update
sudo apt upgrade -y
sudo apt dist-upgrade -y
Fix Potential Hardware Issues
Wi-Fi not working? On older Macs, you may need:
sudo apt install firmware-b43-installerTrackpad issues? Usually works after full installation
Troubleshooting Common Issues
Final Thoughts
Congratulations! You now have Kali Linux running natively on your Mac. This bare-metal installation provides maximum performance for your penetration testing and security work.
Remember: Always use Kali Linux ethically and only on systems you own or have explicit permission to test .
Did this guide help you? Share your experience in the comments below!